How to Start a Fire in a Fire Pit: Step-by-Step Guide
Ready to enjoy a warm, crackling fire in your fire pit? Discover the ultimate How to Start a Fire in a Fire Pit: Step-by-Step Guide with tips and tricks for a perfect blaze every time.

There’s something undeniably magical about gathering around a fire pit—whether it’s roasting marshmallows, sharing stories, or simply soaking in the warmth. But if you’ve ever struggled to get that first spark going, you’re not alone! Learning how to start a fire in a fire pit can seem like a daunting task, especially if you’re new to the world of outdoor fires.
Fear not, though. This step-by-step guide will walk you through the process, from gathering materials to lighting that perfect fire. With a bit of know-how and a few handy tips, you’ll be well on your way to creating a cozy, inviting fire pit experience. Let’s get that fire crackling!
How to Start a Fire in a Fire Pit: Gather Your Supplies
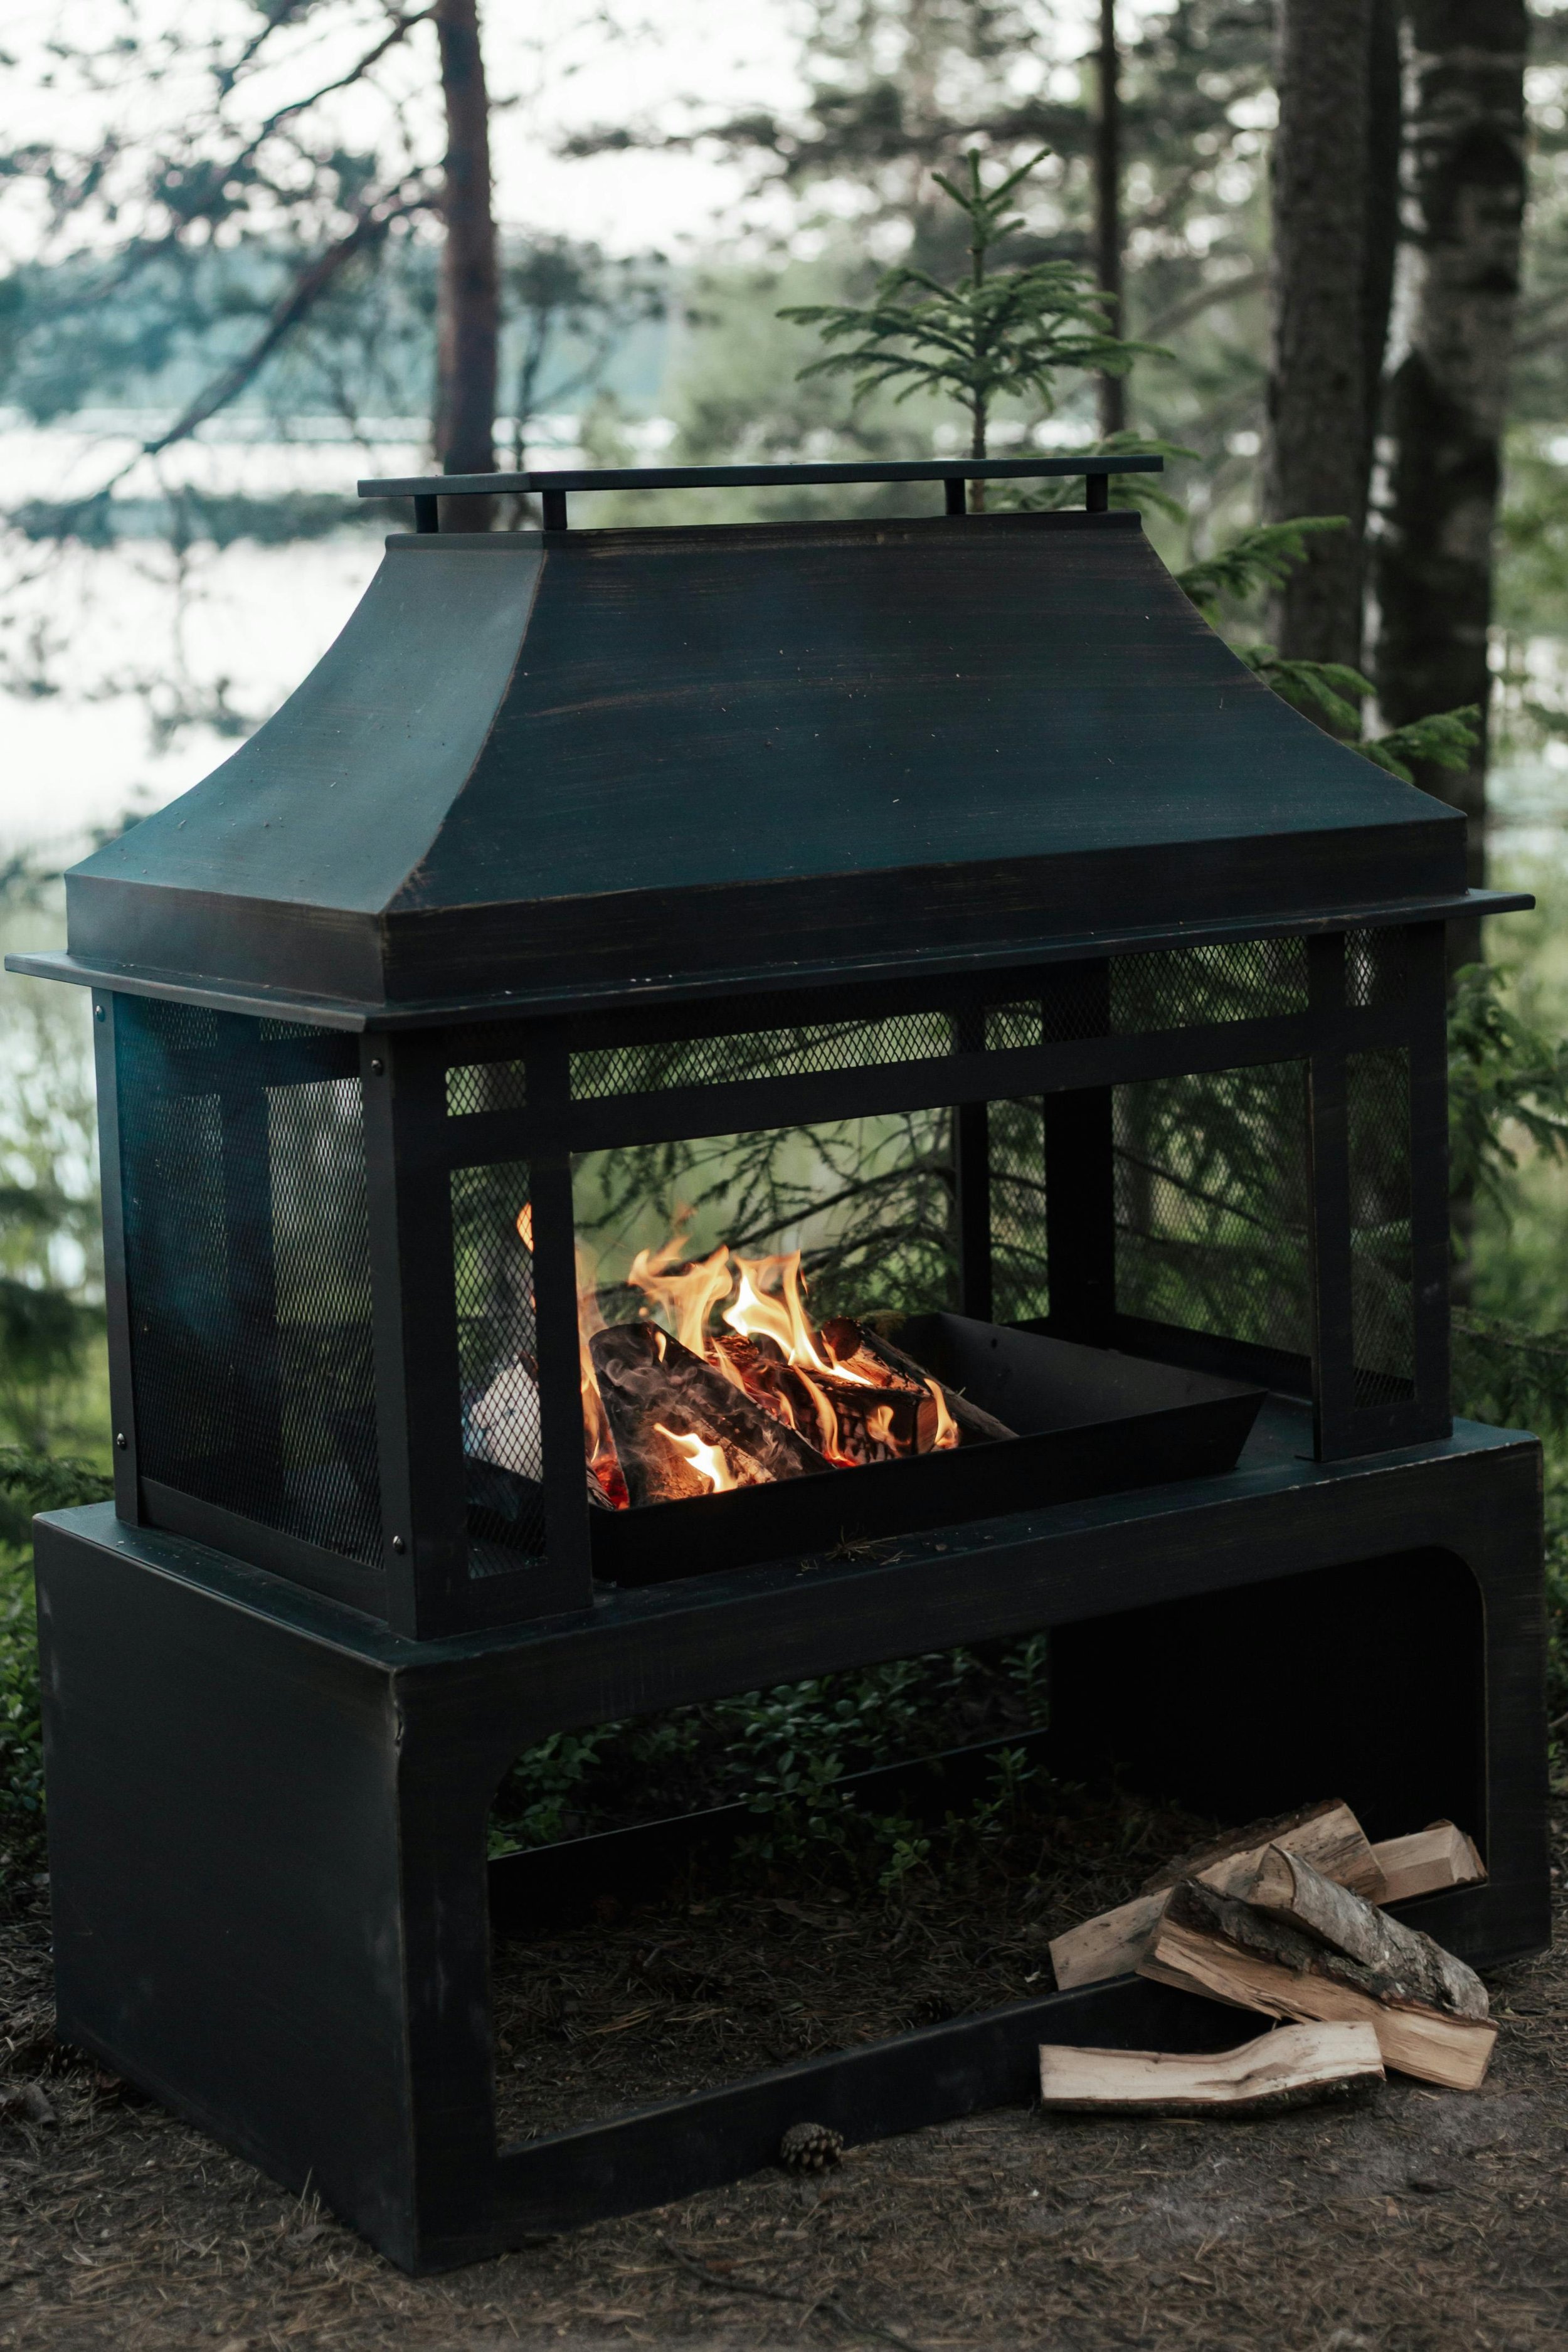
1. Choose the Right Fire Pit
Before you dive into the fire-starting process, make sure you have the right fire pit for the job. There are various types, including:
Stone or Brick Fire Pits: Stone or brick fire pits offer both durability and aesthetic appeal, making them ideal for permanent outdoor setups. Their robust construction ensures longevity and resistance to weathering, while their classic look adds a touch of elegance to your backyard. These fire pits create a cozy gathering spot for outdoor entertaining, providing both functional warmth and a stylish focal point for your outdoor space.
Metal Fire Pits: Metal fire pits are portable and often more affordable, making them a great choice for flexibility and mobility. Their lightweight design allows for easy relocation, so you can enjoy a cozy fire wherever you prefer in your outdoor space. Additionally, their lower cost makes them an accessible option for those seeking a versatile fire pit without a significant investment.
Fire Tables: Fire tables blend functionality with style, making them perfect for adding a modern touch to your outdoor space. They serve as both a functional fire source and a stylish table, creating a sophisticated focal point for gatherings. Ideal for contemporary settings, fire tables offer warmth and ambiance while seamlessly integrating into your outdoor decor.
2. Gather Your Fire Materials
Now that you’ve got your fire pit, it’s time to gather your fire-starting materials. Here’s what you’ll need:
Kindling: Kindling consists of small, dry sticks or twigs that ignite easily and help start a fire efficiently. By providing a quick-burning fuel source, kindling ensures that your larger logs or chunks of wood catch fire more easily and sustain a steady flame. It's a crucial component for building a successful fire and achieving the desired warmth and ambiance.
Firewood: Firewood consists of larger logs that provide the sustained heat necessary for a long-burning fire. These substantial pieces of wood maintain a steady flame and generate consistent warmth, making them essential for extended fire sessions. Properly seasoned firewood burns more efficiently and contributes to a more enjoyable and lasting fire experience.
Tinder: Tinder includes materials like paper, dry leaves, or small, flammable items that help ignite a fire quickly. These materials catch fire easily and provide the initial spark needed to get kindling and firewood burning. Using the right tinder ensures a smooth and efficient start to your fire, setting the stage for a successful and enjoyable burning experience.
Matches or a Lighter: Matches or a lighter are essential tools for starting a fire. They provide the necessary ignition to light your tinder and kindling, ensuring your fire gets off to a successful start. Whether you prefer matches or a lighter, having a reliable source of ignition is crucial for creating a warm, inviting blaze for any outdoor or indoor setting.

How to Start a Fire in a Fire Pit: Step-by-Step Guide
1. Prepare the Fire Pit
Before you start building your fire, make sure your fire pit is ready to go:
Clear Debris: Clearing debris from your fire pit, including old ashes and leftover materials, is crucial for maintaining good airflow. Removing this buildup ensures that air can circulate freely, promoting a more efficient and stable fire. Regularly cleaning your fire pit helps prevent obstructions that could hinder combustion and ensures a safer and more enjoyable fire experience.
Check Ventilation: Checking ventilation is essential for maintaining a steady flame in your fire pit. Ensure that your fire pit has adequate airflow by confirming that vents or openings are clear and unobstructed. Proper ventilation supports efficient combustion, allowing the fire to burn consistently and effectively while minimizing smoke and maximizing warmth. Regular checks help ensure a safe and enjoyable fire experience.
2. Arrange Your Materials
Now comes the fun part—arranging your materials to get that fire started. Here’s a simple method:
Lay Down the Tinder: Lay down a generous amount of tinder in the center of the fire pit to serve as your fire's starting fuel. This foundational layer of paper, dry leaves, or small, flammable materials will ignite easily and help kindle the larger kindling and firewood. Properly arranging the tinder ensures a successful ignition and a steady, robust flame.
Add Kindling: Add kindling on top of the tinder, arranging it in a crisscross pattern. This setup enhances airflow around the kindling, promoting a more efficient and robust burn. The open structure allows air to circulate freely, ensuring that the tinder ignites the kindling effectively and supports a steady, hot fire as you add larger firewood.
Stack the Firewood: Lay your firewood in a teepee or log cabin formation around the kindling. The teepee method involves stacking the logs in a cone shape, while the log cabin method stacks logs in a square formation with kindling in the center.
3. Light the Fire
With everything in place, it’s time to bring your fire to life:
Ignite the Tinder: Ignite the tinder using matches or a lighter, ensuring you light it from several points to achieve an even burn. This approach helps the tinder catch fire more thoroughly and promotes a consistent, steady flame. By evenly igniting the tinder, you facilitate the efficient burning of the kindling and create a strong foundation for your fire.
Watch and Wait: Watch and wait as the tinder catches fire and begins to ignite the kindling. The kindling, once ablaze, will then transfer the heat to the larger firewood, starting it to burn. This gradual progression ensures a stable and effective fire, allowing the firewood to catch and sustain a robust, long-lasting flame.

4. Maintain the Fire
Once your fire is going, it’s important to keep it well-fed and manageable:
Add More Wood: As the fire burns down, periodically add more firewood to maintain a steady flame. This replenishes the fuel supply, ensuring the fire remains strong and consistent. By adding wood as needed, you keep the fire burning efficiently, providing ongoing warmth and ambiance for your gathering or outdoor enjoyment.
Adjust the Logs: Use a fire poker or similar tool to adjust the logs and maintain proper airflow within the fire pit. Regularly shifting the logs ensures that air circulates effectively around the fire, promoting a steady and efficient burn. Proper log placement enhances combustion and keeps the fire burning evenly, providing consistent warmth and light.
5. Extinguish the Fire Safely
When it’s time to put out the fire, follow these steps:
Let the Fire Burn Down: Let the fire burn down to ashes if possible, as this helps ensure a clean and efficient burn. Allowing the fire to naturally diminish reduces the need for frequent adjustments and makes cleanup easier. Once the fire has completely burned down, you can safely dispose of the ashes and maintain a tidy fire pit.
Spread the Ashes: Use a fire poker to spread out the ashes and ensure that all embers are fully extinguished. This process helps prevent any lingering hot spots and promotes a thorough cooling of the fire pit. Properly dispersing the ashes also facilitates easier cleanup and ensures that no smoldering embers remain, reducing the risk of accidental fires.
Douse with Water: Carefully pour water over the ashes to fully extinguish any remaining embers. Stir the ashes with a stick or poker to ensure that every ember is thoroughly cooled and extinguished. This step is crucial for preventing any residual heat from causing a fire hazard, ensuring that your fire pit is completely safe before leaving it unattended.

Conclusion
Starting a fire in a fire pit is a skill that combines preparation, technique, and a little bit of patience. With this how to start a fire in a fire pit: step-by-step guide, you’re equipped with all the knowledge you need to light up your outdoor space and create a welcoming atmosphere. From gathering the right materials to safely extinguishing the flames, you’ve got the tools to make every fire pit experience a success.
So go ahead, gather your friends and family, and enjoy the warmth and charm of a crackling fire. With these tips and tricks, you’ll be a fire-starting pro in no time!
Frequently Asked Questions
How long should kindling be?
Kindling should be about 1 to 2 inches thick. It needs to be small enough to catch fire easily but large enough to support the firewood.
Can I use newspaper as tinder?
Yes, newspaper is a great choice for tinder. Just make sure it’s dry and crumpled to increase its flammability.
What’s the best way to keep the fire going?
To keep the fire going, make sure you add firewood regularly and adjust the logs to maintain good airflow.
How do I prevent a fire pit from smoking?
To minimize smoke, use dry wood and ensure proper ventilation in your fire pit. Avoid burning green or wet wood.
Is it safe to leave a fire pit unattended?
It’s not recommended to leave a fire pit unattended. Always keep a close eye on the fire, and make sure it’s fully extinguished before leaving.